E003 UNLIMITED CLASS WRESTLING
Another nonstop dial, UCW, more than most, radically alters the usual HeroClix game with numerous extraordinary conditions.
WHAT TO BRING: a few extra Special tokens.
THE SETUP: Before objects are placed on the map, place four SPECIAL markers on the map so that they mark the outside corners of a 6-square by 6-square area containing as much clear terrain as possible as close to the center of the map as possible; this area is the Ring. Objects can’t be placed in the Ring.
WHAT IT MEANS: This is the main field of battle. Fighting can still go on outside the Ring, though, so don’t get complacent. Immobile objects might be good to play.
MORE SETUP: Each player chooses one friendly character and places it in an unoccupied corner inside the Ring; this character is his or her wrestler. A wrestler can’t leave the Ring, and treats the edges of the Ring as if they are walls that can’t be destroyed. When a player’s wrestler is knocked out or eliminated, that player must choose a friendly character outside the Ring and place it in an unoccupied corner inside the Ring as his or her new wrestler. If a character is carrying an object when it becomes a wrestler, it drops the object in the nearest unoccupied square before being placed in the Ring.
WHAT IT MEANS: Use Wrestlers with high natural damage value as opposed to reliance on Super Strength. No objects can be placed or brought in the ring.
MORE SETUP: No ranged attacks can be made by any character.
WHAT IT MEANS: Snipers should not be included on your team…you’ll only be wasting points!
TURN THE DIAL: At the end of each turn, turn the dial once or a number of times equal to the number of wrestlers knocked out or eliminated during the turn, whichever is more.
WHAT IT MEANS: This dial moves quickly if you have a lot of players or a lot of short-lived Wrestlers, so stay on your toes, especially if you’re trying to dodge the FAIR FIGHT and DISQUALIFIED! conditions.
FAIR FIGHT (cyan, slots 1-5, 10-12): If any character that isn’t a wrestler is given an action that would affect a wrestler, affect any square inside the Ring, or move the character into or through any square of the Ring, give the character an extra action token after the action resolves.
WHAT IT MEANS: This effect will be in play most of the time. Get around it by fielding non-Wrestler figs with some ability to avoid pushing damage in conjunction with Perplex, TK or Outwit. This way, a non-Wrestler can help his teammate in the Ring without penalty. Even better: use a non-Wrestler with Contingency Plan. It’s not an action, so the FAIR FIGHT condition won’t hurt, and your team is unlikely to use all its action allotment.
POWER BROKER (red, slots 4-11): A wrestler can use Exploit Weakness and Flurry if it does not already possess either or both of those powers. After the resolution of an action in which an wrestler uses a power from this effect, deal the wrestler 1 unavoidable damage.
WHAT IT MEANS: This phase can cause a lot of damage, either via unavoidable clicks from its bonuses or penetrating damage from the enemy. Pick a Wrestler with a pushable dial who stays strong well into the dial. Also consider Fortitude on your Wrestler because POWER BROKER grants Exploit Weakness. Otherwise, don’t rely on damage reducers above high defense values on your Wrestler.
DISQUALIFIED! (black, slots 3-5, 10-11): At the beginning of each player’s turn, he or she rolls a d6 for each character in the Ring who is not a wrestler and has two or more action tokens. On a result of 1 or 2, the character is immediately knocked out.
WHAT IT MEANS: Eventually, non-Wrestlers CAN enter the Ring to (illegally) aid the Wrestler. But it’s really risky. So try using a non-Wrestler with Hypersonic Speed or the Move and Attack ability. When someone can rush into the ring and get out in the same turn, there’s almost no risk of the instant KO condition of DISQUALIFIED!
SUMMING IT UP: While UCW is another dial that really rewards a prepared build, it’s one that tends to nerf most figures equally rather than targeting one group specifically. And anything that stacks the deck a bit more in close combat’s favor is a good thing in my book!

M+M E003 UNLIMITED CLASS WRESTLING

Another nonstop dial, Unlimited Classs Wrestling, more than most, radically alters the usual HeroClix game with numerous extraordinary conditions.

Yeah, it's clobberin' time, all right.

Yeah, it's clobberin' time, all right.

WHAT TO BRING: a few extra Special tokens.

THE SETUP: Before objects are placed on the map, place four SPECIAL markers on the map so that they mark the outside corners of a 6-square by 6-square area containing as much clear terrain as possible as close to the center of the map as possible; this area is the Ring. Objects can’t be placed in the Ring.

WHAT IT MEANS: This is the main field of battle. Fighting can still go on outside the Ring, though, so don’t get complacent. Immobile objects might be good to play.

MORE SETUP: Each player chooses one friendly character and places it in an unoccupied corner inside the Ring; this character is his or her wrestler. A wrestler can’t leave the Ring, and treats the edges of the Ring as if they are walls that can’t be destroyed. When a player’s wrestler is knocked out or eliminated, that player must choose a friendly character outside the Ring and place it in an unoccupied corner inside the Ring as his or her new wrestler. If a character is carrying an object when it becomes a wrestler, it drops the object in the nearest unoccupied square before being placed in the Ring.

WHAT IT MEANS: Try using Wrestlers with high natural damage value as opposed to reliance on Super Strength. No objects can be placed or brought in the ring except by special means.

STILL MORE SETUP: No ranged attacks can be made by any character.

WHAT IT MEANS: Snipers should not be included on your team…you’ll only be wasting points! One exception/loophole: The Laser Turret special object is not a character, so it may still make ranged attacks!

TURN THE DIAL: At the end of each turn, turn the dial once or a number of times equal to the number of wrestlers knocked out or eliminated during the turn, whichever is more.

WHAT IT MEANS: This dial moves quickly if you have a lot of players or a lot of short-lived Wrestlers, so stay on your toes, especially if you’re trying to dodge the FAIR FIGHT and DISQUALIFIED! conditions.

FAIR FIGHT (cyan, slots 1-5, 10-12): If any character that isn’t a wrestler is given an action that would affect a wrestler, affect any square inside the Ring, or move the character into or through any square of the Ring, give the character an extra action token after the action resolves.

WHAT IT MEANS: This effect will be in play most of the time. Get around it by fielding non-Wrestler figs with some ability to avoid pushing damage in conjunction with Perplex, Telekinesis or Outwit. This way, a non-Wrestler can help his teammate in the Ring without penalty. Even better: use a non-Wrestler with Contingency Plan. It’s not an action, so the FAIR FIGHT condition won’t hurt, and your team is unlikely to use all its action allotment. There may also be some Special Powers that might get around this condition.

POWER BROKER (red, slots 4-11): A wrestler can use Exploit Weakness and Flurry if it does not already possess either or both of those powers. After the resolution of an action in which an wrestler uses a power from this effect, deal the wrestler 1 unavoidable damage.

WHAT IT MEANS: This phase can cause a lot of damage, either via unavoidable clicks from its bonuses or penetrating damage from the enemy. Pick a Wrestler with a pushable dial who stays strong well into the dial. Also consider Fortitude on your Wrestler because POWER BROKER grants Exploit Weakness. Otherwise, don’t rely on damage reducers above high defense values on your Wrestler.

DISQUALIFIED! (black, slots 3-5, 10-11): At the beginning of each player’s turn, he or she rolls a d6 for each character in the Ring who is not a wrestler and has two or more action tokens. On a result of 1 or 2, the character is immediately knocked out.

WHAT IT MEANS: Eventually, non-Wrestlers CAN enter the Ring to (illegally) aid the Wrestler. But it’s really risky. So try using a non-Wrestler with Hypersonic Speed or the Move and Attack ability. When someone can rush into the ring and get out in the same turn, there’s almost no risk of the instant KO condition of DISQUALIFIED!

SUMMING IT UP: While UCW is another dial that really rewards a prepared build, it’s one that tends to nerf most figures equally rather than targeting one group specifically. And anything that stacks the deck a bit more in close combat’s favor is a good thing in my book!

Next, we’ll look at a much simpler dial. (Cosmic power tends to make problems go away.)

E002 EVOLUTIONARY WAR
This dial is nonstop; that is, it doesn’t have a red line to signify  an endpoint. So it can continue until the last KO or time is called.
WHAT TO BRING: A current Powers and Abilities Chart (PAC) is mandatory for the GENESIS CHAMBER effect later in the dial.
TURN THE DIAL: At the end of each round.
WHAT IT MEANS: Straightforward.
PURIFIERS (black, slots 1-5): At the beginning of each round, each player can declare a special or standard power. All declared powers are ignored until the end of the round.
WHAT IT MEANS: You want to be careful of fielding powers that are key to your early strategy, especially those shared by multiple characters. PURIFIERS will enable opponents to nix them entirely. And note that the powers are ignored, not countered. This means that even team abilities that grant use of certain powers aren’t immune; if a player chooses Stealth, then Batman Allies are suddenly left exposed. It also means you’ll want to pay attention to pure stats over powers when team building. Note, however, that Traits are immune to this effect.
RESTORATION (cyan, slots 4-7): At the beginning of each round, remove all debris tokens from the map. All destroyed walls are no longer destroyed. All clear, grounded, outdoor terrain is hindering terrain. Each player can choose a friendly character that occupies an opponent’s starting area and heal it of 2 damage.
WHAT IT MEANS: Suddenly, there’ll be a lot of hindering terrain for Stealthy characters (assuming they survived the early game and the brief overlap with PURIFIERS isn’t still nerfing them) to hide in and fliers, Phase/Teleporters and Leap/Climbers to move freely over and through. High-speed characters might be a boon for this segment of the game for getting the free healing in enemy starting zones.
GENESIS CHAMBER (red. slots 8-12): Once at the beginning of each player’s turn, each player can choose a target friendly character and declare a combat value (other than range); if the target possesses a standard power of the chosen value, ignore that power until the end of the turn. Then each player who chose a target rolls a d6. On a result of 1-3, the target can use the standard power on that combat value on the PAC that occurs immediately before the ignored power, until the end of the turn. On a result of 4-6, the target can use the standard power of that combat value that occurs immediately after the ignored power, until the end of the turn. (The first standard power of a particular combat value on the PAC is considered to be immediately after the last standard power of that combat value.) At the end of the turn, deal the target 1 unavoidable damage.
WHAT IT MEANS: This is an entirely optional effect that you should be very careful about using! Basically, you get to swap a power on your dial for one before or after it on the Powers & Abilities Chart (PAC). But it’s 50/50 which you’ll get, and the character takes a click either way, so don’t give up a sweet click for this effect. Moreover, you can do this at the start of both YOUR and an OPPONENT’S turn.  Here’s a guide:
On YOUR turn
Never use GENESIS CHAMBER on:
Phasing/Teleport
Charge
Mind Control
Hypersonic Speed
These will stick you with useless (for offense) or far-inferior (for the circumstances) powers.
Always consider using GENESIS CHAMBER on:
Earthbound
Stealth
In this circumstance, the powers you gain will be much more useful. Make sure it’s a click you can afford to lose, though!
Maybe consider using GENESIS CHAMBER on:
Plasticity
Force Blast
Incapacitate
Smoke Cloud
Poison
Mastermind
Exploit Weakness
Perplex
Leadership
You might get a better power or one of equal worth. Again, beware of the self-damage you’ll take regardless.
On ANOTHER’S turn
Never use GENESIS CHAMBER on:
Phasing/Teleport
Charge
Plasticity
Force Blast
Hypersonic Speed
Stealth
Running Shot
any Attack power
Toughness
Mastermind
Impervious
Invulnerability
Battle Fury
Exploit Weakness
Perplex
Outwit
Leadership
Either the new power is useless on defense or simply not worth the click you’ll be sacrificing.
Maybe consider using GENESIS CHAMBER on:
Earthbound (but ONLY to take the click and get OFF Earthbound at the end of the turn without taking a token)
Super Senses
Defend
Barrier
Willpower
Regeneration
Enhancement
…You might gain a power that could help avoid or reduce big damage. Check out the PAC carefully in relation to your current circumstances. (For example, choosing Barrier will land you either Energy Shield/Deflection or Mastermind, so checking if you have any potential fodder adjacent or are in danger of being shot is key before making the swap.)
Any power not listed here is probably not a good risk to use this effect on.
SUMMING IT UP: Evolutionary War is a simple, straightforward event dial. But the last condition, GENESIS CHAMBER, is so byzantine to figure out in mid-game that players may opt to ignore this optional element completely. This is a phenomenon that afflicts many event dials, as further installments of this series will demonstrate.

E002 EVOLUTIONARY WAR
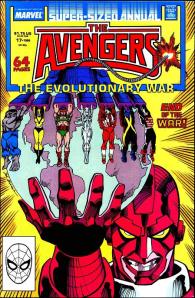
I actually much prefer this image to the one actually used on the dial's card. More "MU-WHA-HA-HA" = much more awesomeness

I actually much prefer this image to the one actually used on the dial's card. More "MU-WHA-HA-HA" = much more awesomeness

WHAT TO BRING: A current Powers and Abilities Chart (PAC) is mandatory for the GENESIS CHAMBER effect later in the dial.

TURN THE DIAL: At the end of each round.

WHAT IT MEANS: Straightforward. Note, though, that this dial is nonstop; that is, it doesn’t have a red line to signify  an endpoint. So it can continue until the last KO or time is called.

PURIFIERS (black, slots A-E): At the beginning of each round, each player can declare a special or standard power. All declared powers are ignored until the end of the round.

WHAT IT MEANS: You want to be careful of fielding powers that are key to your early strategy, especially those shared by multiple characters. PURIFIERS will enable opponents to nix them entirely. And note that the powers are ignored, not countered. This means that even team abilities that grant use of certain powers aren’t immune; if a player chooses Stealth, then Batman Allies are suddenly left exposed. It also means you’ll want to pay attention to pure stats over powers when team building. Note, however, that Traits are immune to this effect.

RESTORATION (cyan, slots D-G): At the beginning of each round, remove all debris tokens from the map. All destroyed walls are no longer destroyed. All clear, grounded, outdoor terrain is hindering terrain. Each player can choose a friendly character that occupies an opponent’s starting area and heal it of 2 damage.

WHAT IT MEANS: Suddenly, there’ll be a lot of hindering terrain for Stealthy characters (assuming they survived the early game and the brief overlap with PURIFIERS isn’t still nerfing them) to hide in and fliers, Phase/Teleporters and Leap/Climbers to move freely over and through. High-speed characters might be a boon for this segment of the game for getting the free healing in enemy starting zones.

GENESIS CHAMBER (red, slots H-L): Once at the beginning of each player’s turn, each player can choose a target friendly character and declare a combat value (other than range); if the target possesses a standard power of the chosen value, ignore that power until the end of the turn. Then each player who chose a target rolls a d6. On a result of 1-3, the target can use the standard power on that combat value on the PAC that occurs immediately before the ignored power, until the end of the turn. On a result of 4-6, the target can use the standard power of that combat value that occurs immediately after the ignored power, until the end of the turn. (The first standard power of a particular combat value on the PAC is considered to be immediately after the last standard power of that combat value.) At the end of the turn, deal the target 1 unavoidable damage.

WHAT IT MEANS: This is an entirely optional effect that you should be very careful about using! Basically, you get to swap a power on your dial for one before or after it on the Powers & Abilities Chart (PAC). But it’s 50/50 which you’ll get, and the character takes a click either way, so don’t give up a sweet click for this effect. Moreover, you can do this at the start of both YOUR and an OPPONENT’S turn.  Here’s a guide:

On YOUR turn:

Never use GENESIS CHAMBER on:

Phasing/Teleport
Charge
Mind Control
Hypersonic Speed

These will stick you with useless (for offense) or far-inferior (for the circumstances) powers.

Always consider using GENESIS CHAMBER on:

Earthbound
Stealth

In this circumstance, the powers you gain will be much more useful. Make sure it’s a click you can afford to lose, though!

Maybe consider using GENESIS CHAMBER on:

Plasticity
Force Blast
Incapacitate
Smoke Cloud
Poison
Mastermind
Exploit Weakness
Perplex
Leadership

You might get a better power or at least one of equal worth. Again, beware of the self-damage you’ll take regardless.

On ANOTHER’S turn:

Never use GENESIS CHAMBER on:

Phasing/Teleport
Charge
Plasticity
Force Blast
Hypersonic Speed
Stealth
Running Shot
any Attack power
Toughness
Mastermind
Impervious
Invulnerability
Battle Fury
Exploit Weakness
Perplex
Outwit
Leadership

Either the new power is useless on defense or simply not worth the click you’ll be sacrificing.

Maybe consider using GENESIS CHAMBER on:

Earthbound (but ONLY to take the click and get OFF Earthbound at the end of the turn without taking a token)
Super Senses
Defend
Barrier
Willpower
Regeneration
Enhancement

…You might gain a power that could help avoid or reduce big damage. Check out the PAC carefully in relation to your current circumstances. (For example, choosing Barrier will land you either Energy Shield/Deflection or Mastermind, so checking if you have any potential fodder adjacent or are in danger of being shot is key before making the swap.)

Any power not listed here is probably not a good risk to use this effect on. And note that you absolutely can’t use it on Special Powers.

SUMMING IT UP: Evolutionary War is a simple, straightforward event dial…mostly. But the last condition, GENESIS CHAMBER, is so byzantine to figure out in mid-game that players may opt to ignore this optional element completely. This is a phenomenon that afflicts many event dials, as further installments of this series will demonstrate.

Whew! That write-up alone was enough to delay this column for months (I wrote it in March or April)! And the next one is no simpler in its way, being another that rewards a proper build and could punish a normal one. Get ready to rumble with Unlimited Class Wrestling!!!
E001 MUTANT MASSACRE
Based on the classic X-Men crossover circa issue 210 or so of the Uncanny X-Men series.
BRING: Character cards (or an official keyword list).
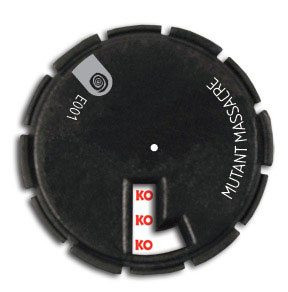
TURN THE DIAL: At the end of any turn in which a character that has a point value of more than 30 points is knocked out or eliminated.
WHAT IT MEANS: Unlike many other dials, which turn at the end of each round, Mutant Massacre only turns when characters leave the game. This means that various conditions can affect your game for a pretty long time, especially the first:
MASSACRE (Black, slots 1-8): Before the beginning of the first turn, each player declares a keyword. During the active player’s turn, if an opposing character that has the keyword named by the active player takes damage, after it takes damage deal that character 1 unavoidable damage. Critical hits to all characters deal an additional 1 damage.
WHAT IT MEANS: Any character with a keyword could be a target for extra harm, and this condition lasts a LONG time. You’ll want to seriously consider fielding characters without keywords. They will not be as vulnerable to the MASSACRE condition. By the same token, you should avoid theme teams entirely.
HELP FROM ARTIE AND LEECH (red, slots 3-4, 7-9): At the beginning of your turn, roll a d6. On a result of 4-6, a single character on your force that can’t already use Outwit can use Outwit once during that turn. In addition, if the result was a 6, you can also give an action token to one opposing character that has zero action tokens.
WHAT IT MEANS: Consider fielding Power Cosmic/Quintessence figures. They’ll essentially be immune to this condition. Anti-Outwit feats/powers like The Society, Outsmart, Fortitude and Stealth will help as well. Willpower and Indomitable will be less vulnerable to the token dump, at least.
EMERGENCY TRIAGE (cyan, slots 5-6): At the beginning of your turn, all of your characters that have two action tokens are healed of 1 damage.
WHAT IT MEANS: Another good reason to invest in characters who can push freely through Willpower or other means to gain free healing.
SUMMING IT UP: Mutant Massacre can truly make for a rough game for the unprepared. This is one dial that’s infinitely more fun when you can build for it. At the very least, avoid keyword themes.

Ugh. OK. So I said I’d have this installment up “some time this weekend?” Yeah. Didn’t happen. So I’m not making those kinds of promises anymore. Just look out for new posts, all right? All right. :)

E001 MUTANT MASSACRE

Based on the classic X-Men crossover circa issue 210 or so of the Uncanny X-Men series.

89071-4706-mutant-massacre_large

BRING: Character cards (and/or an official keyword list).

TURN THE DIAL: At the end of any turn in which a character that has a point value of more than 30 points is knocked out or eliminated.

WHAT IT MEANS: Unlike many other dials, which turn at the end of each round, Mutant Massacre only turns when characters leave the game. This means that various conditions can affect your game for a pretty long time, especially the first:

MASSACRE (Black, slots A-H): Before the beginning of the first turn, each player declares a keyword. During the active player’s turn, if an opposing character that has the keyword named by the active player takes damage, after it takes damage deal that character 1 unavoidable damage. Critical hits to all characters deal an additional 1 damage.

WHAT IT MEANS: Any character with a keyword could be a target for extra harm, and this condition lasts a LONG time. You’ll want to seriously consider fielding characters without keywords. They will not be as vulnerable to the MASSACRE condition. By the same token, you should avoid theme teams entirely.

HELP FROM ARTIE AND LEECH (red, slots C-D, G-I): At the beginning of your turn, roll a d6. On a result of 4-6, a single character on your force that can’t already use Outwit can use Outwit once during that turn. In addition, if the result was a 6, you can also give an action token to one opposing character that has zero action tokens.

WHAT IT MEANS: Consider fielding Power Cosmic/Quintessence figures. They’ll essentially be immune to this condition. Anti-Outwit feats/powers like The Society, Outsmart, Fortitude and Stealth will help as well. Willpower and Indomitable will be less vulnerable to the token dump, at least.

EMERGENCY TRIAGE (cyan, slots E-F): At the beginning of your turn, all of your characters that have two action tokens are healed of 1 damage.

WHAT IT MEANS: Another good reason to invest in characters who can push freely through Willpower or other means to gain free healing.

SUMMING IT UP: Mutant Massacre can truly make for a rough game for the unprepared. This is one dial that’s infinitely more fun when you can build for it. At the very least, avoid keyword themes.

Next time, we’ll look at the next phase of event dial development: Evolutionary War.

During this extended downtime between new sets and Approved Play tournaments, players may be seeking some new scenarios to play. Now is a perfect time to try out some of the event dials released each set since 2007’s Monsters and Mutations!
For those who’ve never played or seen an event dial before, here’s a primer: they’re like playing under ever-changing, multiple Battlefield Conditions. I’ve only played a few, but they can be a total blast…WHEN players are able to build a team for the dial beforehand.
Not all event dials are created equal in terms of team builds. More to the point, some have particular build restrictions that prevent you from simply playing any old team and expect to do well — or even be able to legally play it! And all of them can be confusing.
This series is designed to advise players on how to interpret the sometimes byzantine rules of the event dials, and what sort of team to build or avoid for each one. I’ll quote the rules and conditions (along with the color circle associated with it) found on the folding card that comes with each dial and then give a “WHAT IT MEANS” translation along with tips on what to field or not field when building a team for the chosen dial! Finally, I’ll sum up the event and list extra material players should pack in addition to the usual HeroClix gear.

E001

During this extended downtime between new sets and Approved Play tournaments, players may seek some new scenarios to play. Now, then, is a perfect time to try out some of the event dials released each set since 2007’s Monsters and Mutations!

For those who’ve never played or seen an event dial before, here’s a primer: they’re like playing under ever-changing, multiple Battlefield Conditions. I’ve only played a few, but they can be a total blast…WHEN players are able to build a team for the dial beforehand.

Not all event dials are created equal in terms of team builds. More to the point, some have particular build restrictions that prevent you from simply playing any old team and expect to do well — or even be able to legally play it! And all of them can be confusing.

This series is designed to advise players on how to interpret the sometimes byzantine rules of the event dials, and what sort of team to build or avoid for each one. I’m using the following format:

WHAT TO BRING: Any extra elements needed or recommended besides the usual items used in normal HeroClix games will be listed here.

THE SETUP: Here I quote the special rules for the event dial that are marked with the checked box on the event dial card. Then I give a “WHAT IT MEANS” translation along with tips on what to field or not field when building a team for the chosen dial! I also do the same for each condition that appears on the dial (along with the color circle representing it and which slots they appear on).

Update (01/11/10): Turned this into a prologue for newcomers to the blog and series.