As I checked my inventories of clix stuff and old articles, it occurred to me that I never finished this Event Dial series! There were still two left to go. Here’s the second and final one.

Read the introduction to the series HERE to get caught up on the whole premise and to link to the rest of the articles if you’re a recent visitor or follower and missed them the first time around.

E103 ATLANTIS ATTACKS


THE SETUP: Each force must include at least one character with the Dolphin or Dolphin-transporter speed symbol.

WHAT IT MEANS: Time to get in the pool! More importantly, it show this dial as one of the reasons I started this whole series: some dials have to be specifically built for. In this case, you have to use one of those swimming characters in your collection.

TURN THE DIAL: At the end of each round.

WHAT IT MEANS: Standard steady-moving dial.

Mark of the Brides  (yellow, slots A-E): As a free action, a player can give a Mark of Set token to an opposing character that is adjacent to a friendly character. Each player can do this only twice per game.

WHAT IT MEANS: At some point, a thus-Marked fig is going to get into serious trouble. Try to field a character that can fight at a range so it’s less likely to get Marked. Conversely, consider using a high-speed character with Leap/Climb, Phasing/Teleport to get next to an enemy you want to Mark yourself!

Death of Namor  (lime, slots B-E): Remove a friendly character from the battlefield. All friendly characters with a point value less than that character’s modify their damage by +1 while this ability appears.

WHAT IT MEANS: Choosing a high-point tentpole as your “Namor” can make the remainder of the team dangerous, so it might be worth losing your big hitter for most of the game for this reason (especially if said tentpole has been saddled with a Mark of Set token). Two things to note, though:

  1. Youcan really only pick one character, despite how long this condition lasts.
  2. You don’t have to pick any character.

Whatever you do, you’d better consider the next few conditions…

War Zone: New York (blue, slots C-J): Treat all clear terrain as water terrain. Characters that possess the Dolphin or Dolphin Transporter speed symbol modify their attack and speed values by +2.

WHAT IT MEANS: Swimmers rule. Field plenty of them! If you chose to kill off “Namor,” these characters will be quite buffed. Fliers/Phasers/LeapClimbers can get around the mobility problem.

Becoming Serpent Men (brown, slots E-F): All characters can use Blades/Claws/Fangs and Toughness.

WHAT IT MEANS: Close combat is the flavor of the day, and it overlaps with “Death of Namor” and “War Zone” enough to make a swarm of low-cost swimmers really attractive in this scenario.

Summon the Seven Brides (orange, slots F-I): Once per turn as a free action, you can move any character that has a Mark of Set token to any square on the map that is not blocking terrain.

WHAT IT MEANS: Whatever your plan is, this just blows it the heck up. Don’t field characters or team abilities that utterly depend on positioning to work, such as Batman Allies or Defenders. They’ll find themselves plucked out of hindering terrain or away from higher-defense pals, respectively.

The Serpent Crown (black, slots H-J): Choose a friendly character. The character can use Energy Explosion, Telekinesis, and Mind Control, and is healed of 2 damage whenever a character that has a Mark of Set token is defeated.

WHAT IT MEANS: The destruction of your game plan continues. Whoever’s the most wounded of your pieces could get a nice second wind here.

Demogorge the God-Eater (red, slots J-K): At the beginning of each player’s turn, the character with the highest point value on each other player’s force is dealt 1 penetrating damage.

WHAT IT MEANS: With this condition, the destruction of your game plan, whatever it was, is complete. It’s also one more good reason to make sure your tentpole is off the field thanks to “Death of Namor.”

The Return of Namor (cyan, slot L): On your turn, put the friendly character removed from the battlefield in Death of Namor in any unoccupied square fully healed; you can give the character an action as a free action.

WHAT IT MEANS: Your tentpole (or whoever) is back and wreaking havoc upon the remnants of the game. And guess what? Because this dial lacks a red line, you can start the whole cycle again.

SUMMING IT UP: The last of the Event Dials, it again epitomizes the reason I wrote this long-running series. Some dials absolutely can’t be sprung upon unsuspecting players due to build requirements. And some dials are more fun when you can plan for its bonuses and minimize its detriments. Not one you can pick up and play, Atlantis Attacks is nevertheless one of the best E-dials due to its laser focus on its theme.

______________________________________

That does it for the Building For the Event Dial series. Hope you’ve enjoyed and benefitted from it.

Next: This weekend I continue the Atlantis love with an in-depth (heh) look at the keyword.

As I checked my inventories of clix stuff and old articles, it occurred to me that I never finished this Event Dial series! There were still two left to go. Here’s the first.

Read the introduction to the series HERE to get caught up on the whole premise and to link to the rest of the articles if you’re a recent visitor or follower and missed them the first time around.


E102 WARRIOR MADNESS

"Love" that bad early 1990s art!

THE SETUP
The Madness of a God: The character on your force with the highest point value is “Insane”: opposing to your force and friendly to the opponent to your left. (If two or more characters are tied, that opponent chooses one.) On your turn, before you give any actions, the opponent to your left can give an action to your Insane character. This action does not count against any player’s action total, and the Insane character can also be given actions normally on that opponent’s turn. Insane characters can use Willpower. If the Insane character you own is not defeated, you score 50 additional victory points. Choose a different friendly character to be your “Valkyrie”.

WHAT IT MEANS: Your high-point figure will be a liability, so try to field one that won’t deal death to your own team so easily. Avoid tentpoles! This may be a good time to pull out some less-than-efficient character to head up your team. Also note that your “Valkyrie” will be a key to your team that needs to be watched out for.

TURN THE DIAL: At the end of each round.
The Mind Valkyrie (brown, slots A-F) Valkyries can use Phasing/Teleport and Super Senses.

WHAT IT MEANS: Your “Valkyrie” will be hard to tie down or hit for several rounds. Pick a character that can’t already use these powers.

A Power Gem Gone Astray (blue, slots C-F): Before a player gives an action to your “Insane” character, that player rolls a d6. That player can replace any of that character’s combat values with a value equal to it’s unmodified value plus the result of the roll (halve the result if damage value is chosen) until the beginning of your next turn.

WHAT IT MEANS: The Insane character is even more dangerous to you, so again try not to field your usual power piece.

A Visit to Thanos (yellow, slots G-J) Insane characters can’t be given actions.

WHAT IT MEANS: For these four rounds, your high-point fig will be a sitting duck…one more reason not to pick your best pieces to be your Insane piece. You probably do want to pick one that’s defensively good, though, to help survive the inevitable assault.

Thanos vs. Odin (red, slots I-K) Choose a friendly character. That character can use Outwit, Perplex, and Force Blast. Choose another friendly character. That character can use Quake, Energy Explosion, Pulse Wave, and Toughness.

WHAT IT MEANS: Utter chaos and havoc, basically. With the sudden appearance of Outwit and Perplex, someone’s going off the board, most likely.

Death of the Valkyrie (black, slot L) If your Valkyrie has not been defeated, remove it from the game and you score 50 additional victory points. If your Valkyrie was defeated by an Insane character, that character’s controller scored 50 additional victory points.

WHAT IT MEANS: As though your Insane piece wasn’t enough to worry about, now you’ve got to worry about your “Valkyrie,” too.

SUMMING IT UP: Wild event dial that it is, it’s still not too hard to pick up and play. Warrior Madness probably rewards larger teams with lower-cost figures more than small, tentpole + pit crew-styled forces.

Next entry will wrap up the series entirely with the final event dial (ever?): Atlantis Attacks. Watch for it!

Read the introduction to the series here.

E101 RAGNAROK

What, it's the end of all things AGAIN?

WHAT TO BRING: Characters cards and/or keyword lists to make sure the  characters are accounted for correctly.
THE SETUP: All characters on a player’s force that have the keyword possessed by the most characters on that force (or the character that has the highest point value, if the characters possess no common keyword) are that player’s “Asgardians”. Any remaining characters are that player’s “Monsters”. Then, characters that have the Asgardian or Monster keyword can choose to become part of the group matching their keyword. Place eight objects on the battlefield instead of six, and do not replace any of them with special objects.
WHAT IT MEANS: Themed teams will lose out on some of the conditions and effects of the dial, so you might not want to build one. Super Strength will have a field day.
TURN THE DIAL: At the end of each round.
WHAT IT MEANS: Steady-moving event dial.
Treacherous Loki  (brown, slots A-C): Choose a friendly character. The character can use Outwit and Perplex.
WHAT IT MEANS: You might want to field anti-Outwit tactics (Stealth, Fortitude, Outsmart, certain team abilities) because you WILL be facing the power. By the same token, building in a character to best use this effect would be a good strategy. But you don’t really have to, since you can switch your “Loki” from turn to turn.
A Mob of Mjolnirs  (lime, slots A-C): Monsters can pick up objects as if they possessed Super Strength. All objects deal 1 additional penetrating damage when used in an attack.
WHAT IT MEANS: No need to build in Super Strength to use all those extra objects…at first. But because the effect doesn’t last long, it doesn’t hurt to have some actual Super Strength on the team.
March of the Trolls (blue, slots C-E): Monsters modify their speed values by +2.
WHAT IT MEANS: Move and attack powers get a boost here, so try to fit some among your non-Asgardians. It also helps your monsters act as good tie-up sacrifices.
Rally at Vanaheim (black, slots E-F): Asgardians can use Regeneration.
WHAT IT MEANS: The majority of your build gets a second wind (maybe). Here it pays to build in piece that actually has Regeneration among your Asgardians and feat it with Automatic Regeneration to get extra mileage from this effect.
Fall of the Trickster (yellow, slots G-J): Characters can’t use Outwit or Perplex.
WHAT IT MEANS: Suddenly all those powers and abilities you were so worried about earlier are safe. Now’s a good time to push the advantage, especially in conjunction with the next (and concurrent) dial effect…
The Odin Force Returns (cyan, slots G-J): Choose a friendly character. The character can use the following powers as if it had a range of 12: Energy Explosion, Psychic Blast, Pulse Wave, and Quake.
WHAT IT MEANS: Field someone with high attack value and Running Shot and try to make sure they survive to this point so they can viciously explode your enemies to cinders.
Last Battle (red, slots I-K): Once per action, Asgardians given an action or declared the target of an attack can modify one of their combat values by +1 until that action resolves.
WHAT IT MEANS: No Perplex (thanks to “Fall of the Trickster”)? No problem!
All That Remains (orange, slot L): The game ends immediately. Each player receives 10 fewer victory points for each character on an opposing force that was not defeated.
WHAT IT MEANS: Here’s where building a bigger force (that survives) can yield some dividends. On the other hand, KOs are still king, and and smaller team of beaters will give up fewer points (again, if they survive).
SUMMING IT UP: This dial is about speed-fighting to the absolute death, gaining as many KOs as possible in 11 rounds. Build for such and throw caution to the wind.

Read the introduction to the series here. Catch up on previous articles here.

AAE102 KNIGHTFALL

This dial reflects DC's Batman-centric Knightfall, Knightquest and Knightsend storylines from the mid-199os.

TURN THE DIAL: At the end of each round.
WHAT IT MEANS: Another steady-moving event dial.
Arkham Escape (yellow, slot A): When characters that begin your turn in your starting area are given a move action, it doesn’t count toward your available actions for the turn.
WHAT IT MEANS: Hey, everyone gets Avengers/JLA/Top Cow TA for a round.
Break The Bat (lime, slots B-C): When the result of a successful attack roll is doubles, the damage dealt is pentrating damage.
WHAT IT MEANS: No way to prepare for or defend against this.
A New Batman (red, slots D-G): Once during your turn, you can choose a character on your force. The chosen character is able to use Blades/Claws/Fangs and Toughness (if it can’t already) until the beginning of your next turn. Until the beginning of your next turn, opposing characters get +1 to their attack value when attacking the chosen character.
WHAT IT MEANS: Note that this character can change each round…and may have to when the enemy gets easier shots on the newbie “Batman.” Characters with Charge, Flurry or Exploit Weakness (or all three, natch) are good candidates for this effect.
The System (black, slots E-H): Once during your turn, you can choose a character and modify one of it’s combat values up to +3 for the duration of an action. After the action resolves, roll a d6 and subtract the number of characters (friendly and opposing) adjacent to the character. If the result is equal to or less than the number by which you modified the combat value, deal 2 pentrating damage to the chosen character.
WHAT IT MEANS: Pump ’em up for a price. Taking 2 damage is pretty grevious, but getting to deal a potential +3 damage might be worth it. Just make sure you can handle the possible backlash. Also try to make sure the System’s beneficiary doesn’t have a crowd around him increasing his chances of taking hurt.
Reclaiming The Mantle (blue, slot H): All characters can use Willpower (if they can’t already and can’t use the Indomitable ability). For each of a character’s powers or abilities that has been countered, modify it’s attack value and defense value by +1 (maximum +3).
WHAT IT MEANS: Outwit is not the nerf-all it usually is, so use it with care, if at all.
SUMMING IT UP: This dial is mostly straightforward and uncomplicated (except for some of that “The System” nuttiness).
That wraps it up for DC event dials (for now). But what could have been the end for HeroClix only became an hiatus. And along with figures and feats came new event dials. Stay tuned for RAGNAROK!

Read the introduction to the series here and catch up on previous articles here.

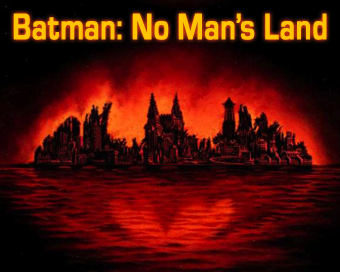
AAE101 NO MAN’S LAND

Based on the 1999 event, in which an earthquake hits Gotham City.

WHAT TO BRING: Three extra Special tokens for each player.
THE SETUP: WHERE’S BATMAN?: Before characters are placed on the map, each player must choose one character from his or her force to be that player’s champion. The champions are set aside until brought into the game by the Return of Batman effect.
WHAT IT MEANS: Said effect won’t come into play until mid-game, so don’t make your champion too big a part of your force.
MORE SETUP: TERRITORIES: After all players’ forces have been placed in their starting areas, but before the beginning of the first round, each player receives three control markers. Beginning with the second player, each player places a control marker on the map at least 5 squares from any starting area being used by a player and all other control markers, and at least 3 squares from the edge of the map. Players take turns placing control markers until all players have no control markers or all players agree that control markers can no longer be placed legally. Control markers can’t be moved or destroyed.
WHAT IT MEANS: You’re setting up zones to occupy on the map. You’re going to have to defend yours and/or take others’, so build your team accordingly. Also pick your control marker locations carefully. There’s going to be little cover and hindering terrain will be a dangerous place to be (in fact, any terrain that’s not clear grounded terrain or water terrain WILL be hindering terrain).
STILL MORE SETUP: NATIVE SURVIVORS: Once per turn when making an attack roll for a character on your force that has the Batman Ally or Batman Enemy team ability or the Gotham City keyword, you can roll 3d6 instead of 2d6; use the two highest results.
WHAT IT MEANS: It pays to stick to the theme!
TURN THE DIAL: At the end of each round.
WHAT IT MEANS: Steady-moving event dial.
AFTERSHOCKS OF THE CATACLYSM (white, slots A-J): All walls are
ignored, and blocking terrain and elevated terrain are hindering terrain instead. Beginning with the second round, at the beginning of each player’s turn he or she can choose an opposing character occupying hindering terrain and roll 2d6. On a result of 9-12, deal 2 damage to the chosen character.
WHAT IT MEANS: First, realize that a printing error on the dial means there’s only an X where the lime color indicated on the card should be. That erratum given, you may want to be really careful about using Stealth-dependent people with less than Invulnerability to protect them. An opponent can get an easy shot on them through this effect. On the other hand, the utter and complete lack of cover means range is king. It might be worth fielding a lot of Stealth anyway just to not get sniped to death when you have to venture out to claim and hold territory later.
CITIZEN WAYNE  (black, slots A-E): Once per turn for the duration of an action, you can modify any combat value of a friendly character (except damage) by +1 for each full 75 points (or fraction thereof) of your champion’s point value (maximum +3).
WHAT IT MEANS: It’s a bit like Contingency Plan, but without having to build up those pesky tokens. It also pays here to use a champion in the 100-point range to gain the +2 boost.
BLOWING THE BRIDGES  (orange, slot C): At the beginning of your turn, choose an opposing character’s starting area and roll a d6 for each character in it; on a result of 1 deal the character 1 penetrating damage.
WHAT IT MEANS: Campers may pay for turtling. Be sure to build a force mobile enough to be out of there by round 3, when this effect shows up.
CLAIMING TERRITORY  (blue, slots D-J): At the end of your turn, immediately score 20 victory points for each of your characters occupying the same square as a control marker.
WHAT IT MEANS: This is extra incentive to get your force out and about. Characters with good speed values, mobility powers and defenses are key get and hold your territory. Consider especially characters with Defend who can use a cheap meat shield to block enemy attackers. You’ll probably want to avoid team formations that require most of your team to stay clumped together, as this will cost you a lot of points down the road unless you can KO the enemy quickly outright without surrendering too many points to them in turn.
SCROUNGING  (yellow, slots E-I): At the end of your turn, choose up to two of your characters that are 3 or more squares from all control markers. For each chosen character, roll a d6 and subtract 3; the character is healed of damage equal to the result (minimum 0).
WHAT IT MEANS: 50% chance at free healing! Mobility powers are good for this effect, too. If a territory holder is getting too beaten up, run away for a shot at healing while replacing him/her with a fresh defender.
RETURN OF BATMAN (cyan, slots F): At the beginning of the round starting with the first player, all players place their champion on the map 6 or fewer squares from (but not in) their starting areas.
WHAT IT MEANS: Hope you got all you needed from the Citizen Wayne effect, because that’s done now. ‘Course, you’ve got your “Batman” in the game now for a 2nd wind.
CONSOLIDATING TERRITORY (red, slots G-K): When making an attack, for each friendly character that occupies the same square as a control marker and that is 8 or fewer squares from the attacker, you can modify the attacker’s attack value by +1 (maximum +3; the character does not need a clear line of fire to the attacker).
WHAT IT MEANS: Here’s when holding your ground earlier can really pay off. But you won’t get long to enjoy the advantage, as the next condition thoroughly invalidates it despite multiple clicks of overlap.
DESTRUCTION OF THE HALL OF RECORDS  (purple, slots J-L): At the beginning of the round, remove all control markers from the game.
WHAT IT MEANS: Ummm…just what it says, which is odd. All the markers would be gone as of slot J. So what’s the point of it being on K and L? I dunno. Looks like another error to me.
Note that this supercedes the previous Consolidating Territory effect even though they overlap for a couple of rounds. Use this condition’s appearance as a cue to move off of currently wrecked buildings or blocking terrain or at least make sure you won’t be shoved out into the open completely.
RECONSTRUCTION  (grey, slot K): All walls are no longer ignored. If characters occupy blocking terrain or elevated terrain when this effect is revealed, move them to the nearest unoccupied square of clear grounded terrain.
WHAT IT MEANS: Buildings are back…for a while. If you weren’t careful about your position in previous rounds, you might be shunted into a bad spot in full view of enemies.
JOKER’S LAST LAUGH (green, slot L): At the end of your turn, choose an opposing character 6 or fewer squares from your champion to which your champion has a clear line of fire; deal 1 penetrating damage to the character.
WHAT IT MEANS: Someone’s gettin’ it unless your champion is completely isolated from the enemy (or the enemy is all hiding).
Note that while this dial should thematically end at this point, it doesn’t have the red line indicating that the dial should stop turning, so the whole cycle can start over again, except this time without control markers, because they only get placed before the game.
(Yeah, seems like a mistake to me, too.)
SUMMING IT UP: Interesting dial that focuses more on positioning and map control than on the usual slugfestivities. It’s hindered a bit by incompatibilities and what look to be straight-up production mistakes, but it’s still playable.
Next: In a Batman-related set like Arkham Asylum, it’s no surprise that the other event dial is also Batman-inspired.

Read the introduction to the series here. Catch up on previous articles here.

E102 INFINITY GAUNTLET

Based on the classic 1991 miniseries.

BRING:
–newer maps with letters and numbers along two edges.
–eight extra tokens marked somehow as the Infinity Gems (event tokens). I use gem tokens that match the colors of each Infinity Gem condition.
–a ton MORE tokens distinct from both your normal action tokens and the event tokens. These’ll be the power tokens.
–Paper to keep track of extra points scored.
PLACEMENT: The Corner of the map where A and 1 intersect is Corner 1; Corner 2 is the next corner clockwise around the edge of the map, and so on. When instructed to place an effect token by an effect of this event dial, roll 2d6 to determine where the determination of placement begins based on the result: Corner 1 (1-3), Corner 2 (4-6), Corner 3 (7-9), Corner 4 (10-12). Next roll 2d6 amd count a number of numbered rows away from the corner equal to the result, then roll 2d6 and count a number of lettered columns away from the edge in that row equal to the result. Place the effect token in the nearest square of unoccupied clear terrain.
WHAT IT MEANS: Tedious placement of tokens that’ll occur all game long. You may want to do a few test runs before the game just to get a feel for Placement so it won’t slow the game down even more.
THE GEMS AND THE GAUNTLET: This scenario requires eight special tokens, clearly labeled with the eight effects listed below (one per token). These are event tokens.
WHAT IT MEANS: Try to pick some markedly distinctive from both the players’ normal tokens and from each other to minimize confusion. I use tokens corresponding to the Infinity Gem colors.
THE GEMS APPEAR: At the beginning of each turn, if the effect token for an effect indicated on the dial is not currently in the game, place the token for the effect on the map, as explained in Placement and as determined by the player whose turn it is.
WHAT IT MEANS: Tedious placement of tokens that’ll occur all game long.
I SEIZE IT FOR MY OWN!: Effect tokens can be carried by any character, but a character may only carry one effect token at a time. When a character picks up an effect token or carries an effect token at the beginning of your turn, you can choose which one of the numbered options of an effect a character can use; the character can use the chosen option as a free action.
WHAT IT MEANS: Fun stuff, since each token gives brand-new power options. No way to plan for this stuff.
SUCH POWER… TOO MUCH POWER!: Each time one of a player’s character uses an option of a Gem Effect, place a power token in front of that player. After that use of the effect resolves, that player rolls 2d6 and adds 1 for each 100 points (or fraction thereof) of the character’s point value; if the result is equal to or less than the number of power tokens in front of that player, remove all power tokens and roll a d6: on a result of 1-3 all effect tokens carried by that player’s characters are dropped, on a result of 4-6 only the most recently used effect token is dropped. When a character carrying an effect token is successfully hit by an attack and the result of the attack roll is doubles, the character drops the effect token (even if it takes no damage from the attack).
WHAT IT MEANS: You have to roll to see if you can hold onto the Gems. You’ll always add at least +1 to the result…the more powerful the character (points-wise), the better the chance of not losing the Gem.
IN SEARCH OF A NEW MASTER: When an effect token is dropped, the effect ends immediately and the token is placed as explained in Placement and determined by the player whose turn it is.
WHAT IT MEANS: You got it…tedious placement of tokens that’ll occur all game long.
TURN THE DIAL: Each time a character is defeated and each time a character is hit with a critical hit and at the end of each round.
WHAT IT MEANS: The dial will turn steadily, and faster with KOs. No camping on conditions you like.
WIN CONDITIONS: Defeating a character carrying an effect token scores 50 additional victory points per 100 points (or fraction thereof) of the defeated character’s point value (maximum 150 additional points per character defeated); defeating a character not carrying an effect token scores 50 fewer points (minimum 0 victory points total per character; scored victory points can’t be negative).
WHAT IT MEANS: Resisting the temptation of power may be worth it, especially for low-point characters. Consider fielding one or two highly effective cheapies on your squad.
Okay, that’s all the super-tedious stuff out of the way. Now for the fun part…the Gems!
GEM EFFECT: SPACE (Purple, slots A-E): Choose one: (1) This character, (2) another character, or (3) any standard object, place the choice in any square of unoccupied clear terrain.
WHAT IT MEANS: Nowhere is safe from the character with this gem. An enemy Batman hiding in a bush? Bring him to the light with option 2. Your own Batman have this gem himself? Put him behind a bush with option 1. Note, also, that this effect is not any sort of action; feel free to attack or move normally afterward! This gem is fine for any character.
GEM EFFECT: MIND (Blue, slots C-F): Choose one: (1) Use Mind Control or (2) use Incapacitate; for both options, modify the character’s attack value by +2 and make the attack as if the character has two range lightning bolts and a range of 8.
WHAT IT MEANS: The character becomes Mutations and Monsters’ Mastermind for a turn. Best for characters who’ll be fighting at mid-range.
GEM EFFECT: SOUL (Green, slots F-I): Choose one: (1) Use Exploit Weakness and Steal Energy (but heal the character of damage equal to the damage taken by the target of the attack) or (2) use Support (do not subtract 2 from the roll of the d6) or (3) use Regeneration (do not subtract 2 from the roll of the d6) or (4) use Poison (but deal damage equal to 3 minus the number of each adjacent opposing characters).
WHAT IT MEANS: Equally effective in close quarters and in the rear field. It does almost zip for ranged fighters, so you’ll want your bricks or support players to grab this gem.
GEM EFFECT: REALITY (yellow, slots A-D): Choose one: (1) Choose a standard power (including named powers using the power) or an ability (including team abilities); the chosen power or ability is countered on all opposing characters until the beginning of your next turn or (2) choose an opposing character; all of the character’s powers are countered until the beginning of your next turn or (3) use Barrier, Outwit or Perplex (but modify the chosen combat value of the target character by +2 or -2).
WHAT IT MEANS: You’ll want to consider fielding Power Cosmic or Quintessence to protect against this effect; Fortitude won’t help. Note also that no line of fire is needed for those first two options. A character with this gem ought to hide if it can.
GEM EFFECT: TIME (orange, slots B-E): Choose one: (1) Roll a d6; before the beginning of your next turn, this character can use Probability Control a number of times equal to the result (but only once per roll) or (2) until the beginning of your next turn, all friendly characters 6 or fewer squares away to which this character has a clear line of fire can use Super Senses (if they can’t already).
WHAT IT MEANS: Rerolls galore. The best character to use this gem is a mid-range fighter or mobile supporter able to see the fighting field.
GEM EFFECT: POWER (Red, slots E-I): Choose one: (1) Until the beginning of your next turn, this character can use Impervious (but add 1 to the result when rolling the d6, maximum result 6) or (2) this character can modify its damage by +2 (to a maximum damage value of 5) and can use Exploit Weakness or Psychic Blast (as if it had a range of 10).
WHAT IT MEANS: Try to get this gem on your fighters.
GEM EFFECT: EGO (Brown, slots A-B, G-L): Choose one character carrying an effect token and roll a d6. On a result of 1 or 2, until the beginning of that character’s player’s next turn all effects of the chosen characters effect token are ignored; on a result of a 3-6, the character drops the effect token.
WHAT IT MEANS: Getting tired of a gem messing up your game? Snuff its effect with this effect. No line of fire needed, either. Naturally, Ego isn’t affected by itself. :)
THE INFINITY GAUNTLET (White, slots J-L): When the Infinity Gauntlet effect token is placed, all other effect tokens are dropped and all other effect tokens (except Ego) are removed from the map. When the Infinity Gauntlet event does not show on the dial, the Infinity Gauntlet event token is dropped and removed from the battlefield. This character can choose up to one option from each of the gem effects described on this event card (each use of an option places a power token normally).
WHAT IT MEANS: for a few rounds, whoever has this gem is like unto a god. Keep a high-speed character around to grab this (or the Ego) token ASAP.

(Just got an image of Lightspeed with Phenomenal Cosmic Powah™.)

SUMMING IT UP: Although it’s very complicated to play, and as mentioned, full of tedious placement of tokens all game long, this remains one of the event dials that won’t inordinately punish certain team builds. Pick up and play!

…and read.

And read.

I believe that does it for the Secret Invasion set’s event dials. Next time we’ll look at Arkham Asylum’s offerings. ‘Til then…!

Read the introduction to the series here. Catch up on previous installments here.

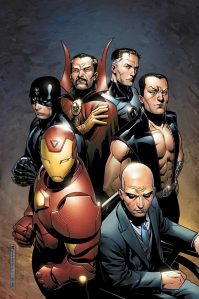
E101 THE ILLUMINATI

Based on the 2007 miniseries. (Also a heckuva 900- or 1000-point team. But that's a post for another day.)

THE SETUP: All characters on a player’s force with the keyword possessed by the most characters in that force (or the character with the highest point value, if the characters possess no common keyword) are that player’s Illuminati.
WHAT IT MEANS: Themed teams could be all Illuminati. Or your tentpole could be the sole Illuminati. Read the advantages and disadvantages of being “Ill” (heh) as you build your squad. Also be sure to bring all your character cards and/or keyword lists.
TURN THE DIAL: At the end of each round.
WHAT IT MEANS: No matter how much you like (or hate) a given condition, it’s not going to last long.
CAPTURED BY THE SKRULLS (Green, slot A): Characters on your force that are not Illuminati can use Outwit (if they can’t already) and the Capture ability.
WHAT IT MEANS: Either a lot of Outwit or not. Here’s where a theme team will have an apparent advantage: it’ll be more likely to have first turn and thus be able to move to counter the enemy’s powers, perhaps en masse, and leave them unable to respond in kind. But don’t go planning your keywordy cheese just yet. To begin with, first-turn immunity will prevent most initial attacks. Second, few characters have the speed to get within Outwit range of the enemy still in their starting area. Third, those characters would lose their own first-turn immunity and could get absolutely creamed by the very team they tried countering or capturing. Finally, the whole effect lasts just one round anyway, so it’s not worth bothering with or building for at all in a normal game. Only give it a thought if you’re in a 3-or-more-player battle royale game.
ESCAPE! (Yellow, slot B): All captives are immediately released. All Illuminati can use Phasing/Teleport.
WHAT IT MEANS: Whatever you gained in the first condition is lost here…one more reason not to even bother with it. Similarly, this condition only lasts a turn. Consider using this opportunity to get your cheap tie-up Illuminati figs to base targets of choice if they’ve already taken their turn this round.
GATHERING THE INFINITY GEMS (Orange, slots C-E): Illuminati on your force can use Probability Control during your turn (if they can’t already). At the end of your turn, roll a d6 for each Illuminati that used Probability Control; on a result of 1 or 2, deal that character 1 unavoidable damage.
WHAT IT MEANS: Finally, a condition that lasts a while, but still potentially useless. A first glance, this looks like another boon to themed teams sharing a common keyword. But the chance of unavoidable hurt makes it a less attractive option. It’s even worse for a team with only one Illuminati.
FACING THE BEYONDER (White, slots E-G): Once during your turn, choose a character on your force that is not Illuminati; that character can use Barrier and Smoke Cloud as free actions, and Outwit (targeting an opposing character that is Illuminati) and Perplex (targeting a friendly character that is Illuminati).
WHAT IT MEANS: All that stuff before that made themed teams seem like a potentially good deal? Fuggedaboudit. This condition will open up that whole team to its potentially crippling effects while being denied its benefits. With that in mind, strongly consider Fortitude to guard your Illuminati tentpole against this and earlier conditions.
ARGUING FOR HUMANITY (Purple, slots G-I): All Illuminati can use the Indomitable ability and Regeneration.
WHAT IT MEANS: A good second wind for any team, especially Illuminati-heavy ones.
DUEL TO THE DEATH (Black, slots J-K): Illuminati on your force modify their attack values by +2 when attacking opposing Illuminati; if Illuminati deal 2 or less damage, the damage is penetrating damage.
WHAT IT MEANS: Illuminati-heavy teams will gain a major advantage over tentpoles, and this advantage lasts for the rest of the game.
INFILTRATED! (Blue, slot K): All Illuminati can use Outwit and Shape Change (if they can’t already).
WHAT IT MEANS: Illuminati-heavy teams again have a distinct advantage, especially if the Illuminati-tentpole player didn’t equip theirs with Fortitude. And again, this effect doesn’t go away.
SUMMING IT UP: First, do not run a themed team. You’ll pay for it. Next, make sure your Illuminati character or characters have Stealth or a mobile taxi (or taxis) or meat shields or some other method of gaining line of fire while denying it to opponents for all those event-dial-granted powers. Finally, decide if you’re going Illuminati-heavy (as with a near-themed team — minus one) or Illuminati-tentpole, and feat appropriately.
The series continues next time with something only alluded to in this dial: The Infinity Gauntlet!

Read the introduction to the series here and catch up on the rest of the series here. Especially note an update to the Civil War article.

E200 CRISIS ON INFINITE EARTHS: PARIAH

Another e-dial with a sculpt, this one based on this image:

Such a WHINER. Just because entire universes are being destroyed is no reason to be such a drama queen.

THE SETUP: Put this event dial (also called “PARIAH”) in a square of clear grounded terrain as close to the center of the battlefield as possible. The square occupied by PARIAH is considered to be blocking terrain for movement purposes and hindering terrain for line of fire purposes.
WHAT IT MEANS: Read on.
MORE SETUP: Any standard character adjacent to PARIAH modifies its defense value by +2 when attacked by a character with the Colossal damage symbol.
WHAT IT MEANS: Ah, it would seem that one would like to get adjacent to the center of the map, and PARIAH, as quickly as possible. But it’s not that simple…
TURN THE DIAL: At the end of the round, roll 2d6. If any character is adjacent to PARIAH, turn the dial on a result of 8-12; if no character is adjacent to PARIAH, turn the dial on a result of 6-12.
WHAT IT MEANS: The dial moves slower if PARIAH has company.
GREATEST SCIENTIST OF THEM ALL (green, slot J): Once during your turn, choose a character on your force that can draw a clear line of fire to PARIAH and is 8 or fewer squares away. The chosen character can use Perplex or Probability Control if it can’t already use it.
WHAT IT MEANS: This is another reason to stick near PARIAH. Stealth might be a good idea, too, to be able to use this effect without being in the open.
HOW MANY MORE WORLDS MUST DIE (white, slots B-G): Roll a d6 at the beginning of the round. All characters a number of squares equal to or less than the value on this event away from PARIAH that are not adjacent to PARIAH are dealt 2 damage; on a result of 1 or 2, the damage is penetrating damage.
WHAT IT MEANS: You REALLY want to be next to PARIAH if you’re anywhere near the guy. But, as I alluded to earlier, it’s not that simple, because of the next effect…
HERALD OF THE END (purple, slots B-G): At the end of your turn, roll 2d6 and subtract 6 from the result (minimum result 0; a player playing Anti-Monitor does not subtract 6 from the result). You must move PARIAH a number of squares equal to the result, ignoring characters and terrain as long as PARIAH ends the movement in a square of non-blocking terrain as far as possible from the square he previously occupied.
WHAT IT MEANS: Whoever gets first turn has a disadvantage. Because this effect allows players to move PARIAH in a straight line in any direction, player 2 (or whoever) can march him near (but not adjacent to) enemy figures who will then have no choice but be dealt damage by “How Many More Worlds Must Die” in the beginning of the next round. For this reason, one might want to avoid themed teams and the initiative roll bonus they offer.
I CAN ONLY WATCH! (cyan, slots C, E-F): Characters adjacent to PARIAH can’t be given an action if they have one or more action tokens.
WHAT IT MEANS: Being next to PARIAH isn’t all good. In fact, it might be positively disastrous if “Herald Of The End” and “How Many More Worlds” combine to get these effectively frozen figs exploded.
SAVED FROM EARTH-6 (yellow, slots F-G): At the end of your turn, choose a friendly character adjacent to PARIAH and heal the character of damage equal to 4 minus his damage value (minimum 0).
WHAT IT MEANS: Your big tentpole hitter shouldn’t be cowering near PARIAH on principle…not for this effect, anyhow. Lesser pieces, on the other hand, may well benefit.
TRAPPED AT THE DAWN OF TIME (orange, slot H): Remove PARIAH from the battlefield (all events on the event dial remain in effect normally). All characters ignore pushing damage.
WHAT IT MEANS: All those bonuses you were depending on in the earlier phase of the battle? Gone now. But now you get super-Willpower.
FINAL BATTLE OF QWARD (red, slot I): During one attack per turn, a character can modify its damage value by +1 if that value is not otherwise modified or replaced. Damage dealt by this attack can’t be reduced to less than 1.
WHAT IT MEANS: Armor piercing for everyone! This is a good reason to field characters with good defense numbers down the dial, because their damage reducers will be rather compromised. By the same token, though, higher-level damage reducers might be worth having to weather the extra-hurtful attacks.
SUMMING IT UP: For a guy named PARIAH, he sure has a lot of company. This dial will only mess up themed teams if they win first turn and then get hit with “How Many More Worlds” consistently.
Next time, we’re back in the Marvel universe to look the Illuminati.

Read the introduction to the series here and catch up on previous articles here.

E100 CRISIS ON INFINITE EARTHS: SUPERGIRL

Saddest cover in DC history.

THE SETUP: At the beginning of the game, choose a character on your force. The chosen character is your Champion. Put 10 champion tokens on your Champion’s character card.
WHAT IT MEANS: Read on.
MORE SETUP: Once per turn when your Champion is given an action, you can remove champion tokens from its character card and modify one of your Champion’s combat values (other than damage) by an amount equal to the number of tokens removed until the action resolves.
WHAT IT MEANS: One key character essentially gets to use the Contingency Plan feat on themselves for free. Not bad.
STILL MORE SETUP: When any character on your force makes a critical hit, put a champion token on your Champion’s character card.
WHAT IT MEANS: A chance to get more use out of the Champion thing.
TURN THE DIAL: At the end of a round in which any player’s Champion was given a non-free action.
WHAT IT MEANS: A dial that can move as quickly or slowly as the players want it to.
WE FIGHT TO LIVE AS LONG AS WE CAN (purple, slots A-B, G-J): Your Champion can use Willpower if it can’t already use it. Once during your turn, you can heal a friendly character adjacent to your Champion of 1 damage.
WHAT IT MEANS: You can push early and often. Not only can your Champion do it freely, but non-Champs can get free healing by hanging near him, making the self-damage of little concern.
RECRUITED BY HARBINGER (yellow, slots C-E): At the beginning of your turn, roll a d6. You can choose a number of your characters up to the result and put them in unoccupied squares in your starting area (they do not have to break away). After the first character is placed, each character placed must be placed adjacent to another character placed by this effect.
WHAT IT MEANS: Need to beat a hasty retreat? No problem with this effect. Field a character with Support (and perhaps the feats Triage or Invigorate) to hang out back there.
UNDER THE INFLUENCE OF THE PSYCHO-PIRATE (cyan, slots D-F): When you give a character other than your Champion a move action, after moving, the character can immediately make a close combat attack targeting an opposing character as a free action.
WHAT IT MEANS: This is a good reason to not go too top-heavy with your Champion and field some good melee fighters in addition. Note that you get a free close combat attack, not a close combat action, so no Flurry, Blades, Exploit Weakness, Close Combat Expert or the like. Super Strength, Steal Energy and plain ol’ high damage work fine, though…and hey! Leap/Climb is thoroughly compatible with this Pounce-like attack.
WORLDS IN LIMBO (red, slots F-J): At the beginning of your turn, roll 2d6. If the result is 9-12, you can choose one of the following: characters, hindering terrain, or blocking terrain. Until the end of your turn, all your characters other than your Champion ignore what has been chosen for movement purposes, but characters can’t end their movement in a square containing what has been chosen.
WHAT IT MEANS: High-Speed characters can take extra advantage of this effect.
JOURNEY TO THE ANTIMATTER UNIVERSE (green, slots G-J): Rolling two 1s is a critical hit. Rolling two 6s is a critical miss.
WHAT IT MEANS: Madness!!! Seriously, it’s almost exactly like the old battlefield condition. No big deal.
THE STATUARY IS ALIVE! (gray, slots H-I): Once during your turn when an opposing character occupies or is adjacent to hindering terrain, blocking terrain, elevated terrain, or a square containing an object, you can roll a d6 and deal damage to the opposing character equal to the result -4 (minimum 1).
WHAT IT MEANS: You’ll probably want to avoid Stealthy characters entirely, unless they’ve got some sort of damage reduction. “The Statuary Is Alive” will eat them alive if they use hindering terrain to hide in and the other team will if they stay in the open.
THE DEATH OF SUPERGIRL (black, slot J): All damage dealt to and by your Champion is penetrating damage.
WHAT IT MEANS: Hope you picked a Champion with a long dial, because he or she’ll need it to survive this effect. Strong Attack and Defense Values down the line will also help. Penetrating damage doesn’t matter if the attack doesn’t land.
SUMMING IT UP: Although this dial appears to encourage extreme tentpoling, DON’T DO IT. There’s just as much for lesser pieces to benefit from. And as you can see, it rewards a pre-built team a bit more than a random one. But it won’t completely hose any team other than a Stealth-heavy one. And nobody plays that anymore…right?

"I know when I'm not wanted."

Next installment will literally bring the Crisis to its KNEES.

Read the introduction to the series here and catch up with previous entries here.

E006 DC ONE MILLION

This the DC 1,000,000 version of the JLA from the DC One Million event of 1998 that inspired this event dial. But not one of their HeroClix versions is actually better than their present-day counterparts.

TURN THE DIAL: At the end of each round and at the end of a player’s turn if the player chooses to roll a d6 and the result is 5 or 6.
WHAT IT MEANS: This dial may move a bit faster than most. Note that you don’t have to roll if you’re OK with the current conditions. :)
THE KNIGHT FRAGMENT (green, slots G-I): Any character occupying the same square as (but not carrying) an object can use Ranged Combat Expert or Telekinesis.
WHAT IT MEANS: Oooo, your Stealthy characters can turn into high-powered snipers (if they have range) or mobility machines (via Telekinesis). Plan accordingly. Conversely, mobile characters with Super Strength can rob enemies of this effect by taking the objects away.
THE HOURMAN VIRUS (orange, slots B-D): At the end of your turn, roll 2d6. On a result of 2-5, choose an opposing character and deal it 1 damage.
WHAT IT MEANS: Avoid fielding characters with high defense values but no damage reducers. The HOURMAN VIRUS will allow your opponent to deal them free damage.
THE BIRTH OF SOLARIS (red, slots E-J): Once per round during an opponent’s turn, one of your characters can use Probability Control if it can’t already use it.
WHAT IT MEANS: Note that this is only good for forcing enemy rerolls. If your high-defense character(s) survived the HOURMAN VIRUS, this effect might help them more.
853RD-CENTURY COUNTERPARTS (blue, slots A-L): Once during your turn and once per round during an opponent’s turn, you can modify one of the combat values (except damage) of one of your characters by the amount indicated by this event.

It's like getting free Perplex!!!

WHAT IT MEANS: Need a boost in range, or attack value? You’ve got it. Need to make your character even more unhittable? Use this effect to to boost the defense of whomever the enemy’s targeting this turn.
THE RETURN OF SUPERMAN-PRIME (yellow, slots J-L): At the beginning of your turn, choose a friendly character and heal it of 2 damage.
WHAT IT MEANS: This regenerating effect can really lengthen the game, especially because, as an end-of-dial effect, it does not pass away.
THE FALL OF VANDAL SAVAGE (black, slots K-L): Once during your turn, one of your characters can use Outwit if they can’t already use it.
WHAT IT MEANS: Stealth is a boon once again to defend against this effect. Other anti-Outwit tactics will also yield dividends.
SUMMING IT UP: This event dial is friendly to all builds (perhaps a tad moreso to Batman Allies) and fairly simple to pick up and play.
That wraps up all the event dials in HeroClix found in boosters. See one of the few dials with sculpts next time.